
Water-based PU sample evaluation
How to Evaluate Water-Based PU Adhesives for Automotive Interiors
Read initial bond strength, peel results and strength after conditioning together
To evaluate a water-based polyurethane adhesive for automotive interiors, fix the substrate combination and bonding process first. Record early holding, peel results at defined times, and performance after conditioning or environmental exposure separately. Read each peel result with the specimen width, angle, speed, timing reference and failure location. A hand pull or a single time point cannot describe every aspect of that material combination in later operations and service conditions.
Confirm what the sample actually is
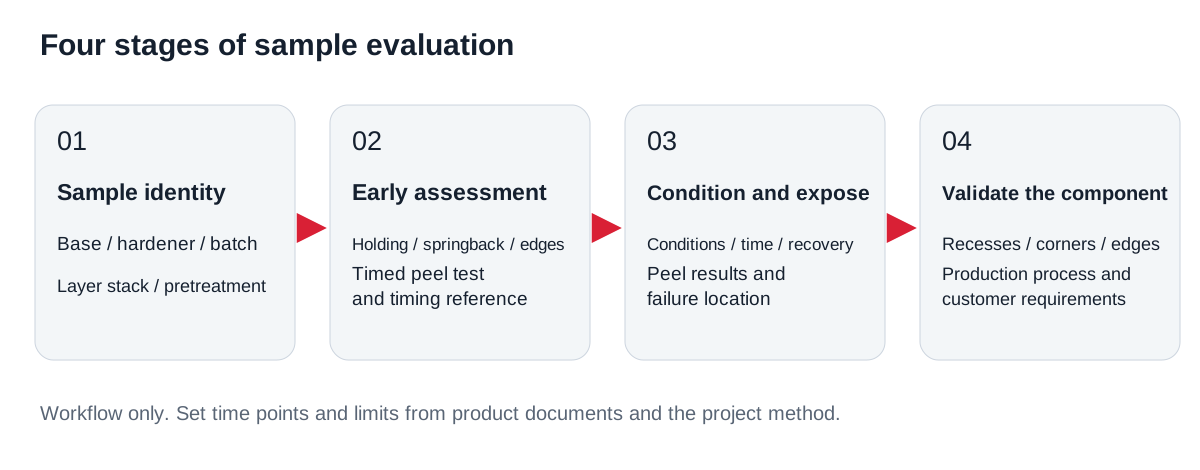
Water-based polyurethane adhesive is also commonly called water-based PU adhesive. PUD means polyurethane dispersion; the term alone does not tell you whether a sample is a raw resin, a formulated adhesive or a system requiring a matched component. Check the product name, batch and TDS/SDS revisions before planning tests to reduce ambiguity when interpreting the results.
RELANET R-5670 is a water-based PU adhesive. R-60C is a crosslinking hardener for waterborne polymer emulsions. When evaluating this two-component system, identify the base adhesive, matched hardener and mixing basis actually used on the test sheet. Use the current documents and test plan agreed by both parties for the addition level, working time after mixing and application window. Components in the R-60 series are not interchangeable simply because their names are similar.
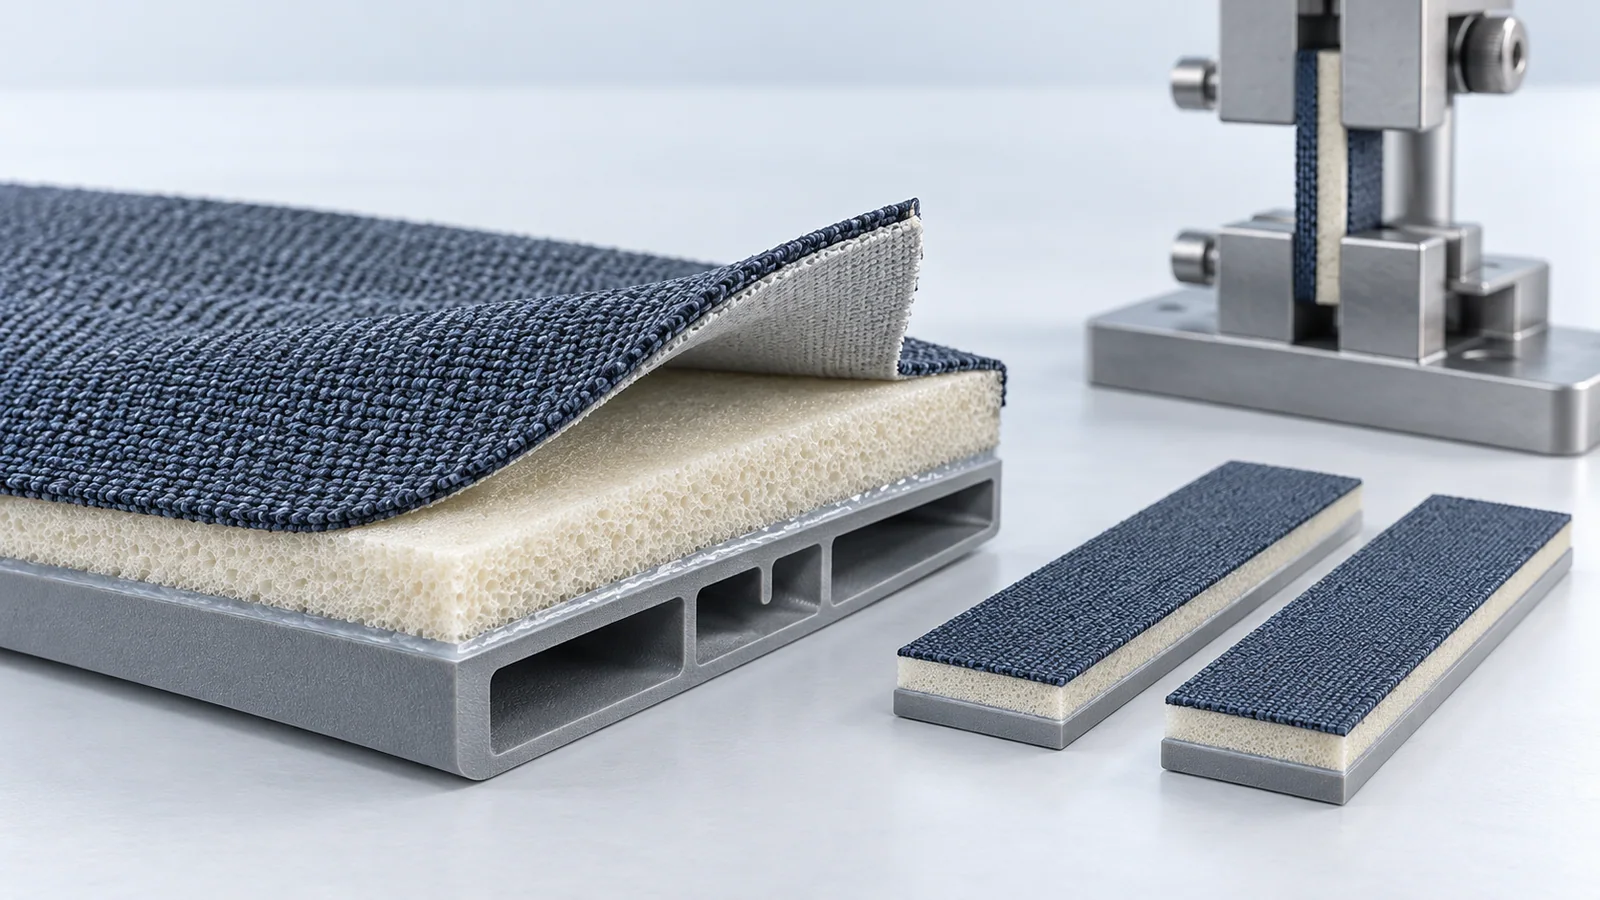
Describe the substrates fully as well. Door panel, instrument panel and headliner are component names; the PP carrier, surface treatment, foam, skin backing and material on the other side define what the test is comparing. Record any change in material grade, batch or pretreatment separately.
Record initial tack and initial bond strength separately
Initial tack describes the ability to stick shortly after contact and must be accompanied by the observation or test method. Initial bond strength needs a defined early time point and loading method. Finger feel, lifting a corner and peel force measured on a testing machine answer different questions; do not combine them in one results field.
For wrapped parts, early assessment can first check springback after removing the tooling, lifting in recesses and edge movement, followed by quantitative testing at the agreed time. These observations address risks before handling, trimming or the next operation. State the event from which timing starts, such as the end of pressing, rather than writing only “1 minute.”
Initial tack, green strength and initial bond strength also need to be read in context. Here, “early holding” describes whether a part maintains its shape under the process conditions at that time. “Initial bond strength” describes a measurement at a specified early time point. These terms are not automatically the same property.
Report the peel method and units with the force
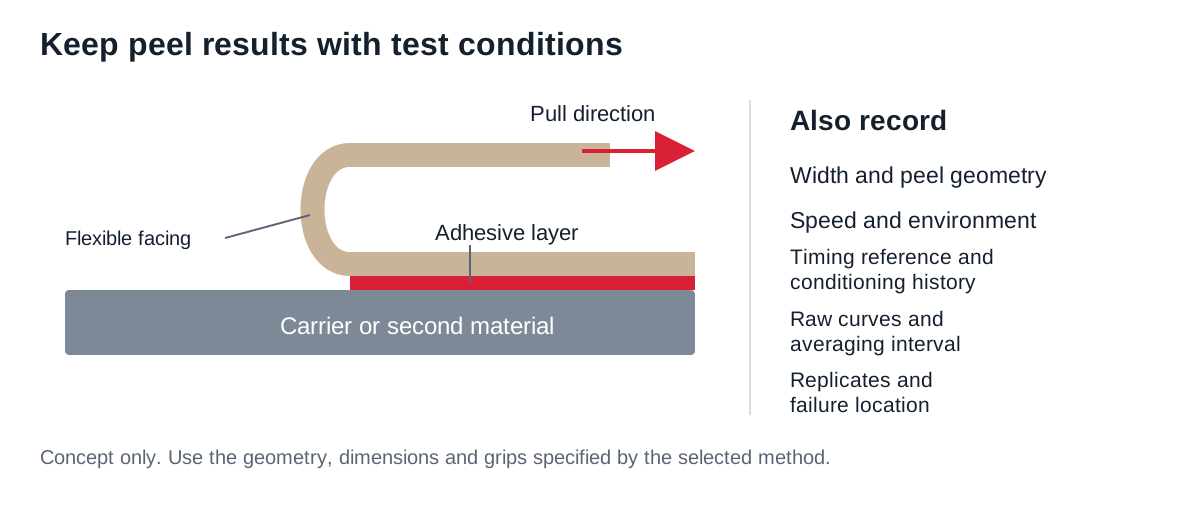
A comparable peel record should identify at least the two materials, specimen width, peel geometry, test speed, measurement environment and averaging interval. Retain the original curves and information on replicate specimens. Label peak force, mean force over a stable interval and width-normalized results separately. N is force; N/mm and N/25 mm include a width basis. Do not drop that denominator and compare the numbers directly. [1][2]
The test method must also suit the material combination. A flexible material bonded to a rigid carrier may require different grips and peel geometry from a joint with two flexible materials. The project method determines the standard and edition to use; this record framework does not replace the full test standard. [1][2]
How to read two published R-5670 and R-60C time points
One set of typical results published by RELANET uses a PVC-and-knitted-fabric combination bonded to flame-treated PP with R-5670 plus R-60C. The published method specifies a 25 mm width, 180° reverse peel and 200 mm/min. The two time points are listed below. [4]
| Time point | Published result | What it describes |
|---|---|---|
| 1 minute after bonding | Mean 25 N/25 mm | Early peel performance for this material combination and the recorded process |
| After 7 days of conditioning | Approximately 60 N/25 mm | Peel performance at this conditioning time point; the published measurement temperature is 23°C ± 5°C |
These are company-published typical results, not guaranteed minimums for every substrate. The public page does not provide the complete mixing details, conditioning environment, replicate count or original curves for this test set. The stated 23°C ± 5°C applies only to the published 7-day measurement; it must not be assigned to the early time point or the entire conditioning period. Mixing ratios, drying and pressing conditions or specimen identifiers from other tests must not be used to fill the gaps.
The example shows why early and post-conditioning time points need separate assessment, but it does not support a continuous strength-development curve. “Final strength” in customer documents should also carry a defined assessment time and conditions. One 7-day result is not a universal endpoint for all adhesives.
After separation, record where failure occurred
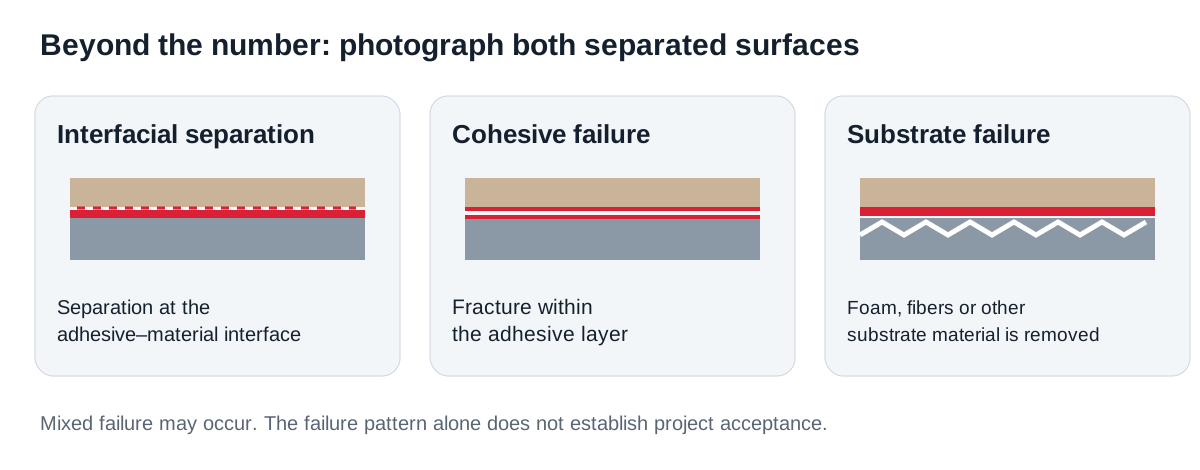
Photograph both sides after separation. Record which side retains most of the adhesive, whether fracture occurred within the adhesive layer, and whether foam, fibers or other substrate material was removed. Reading strength together with failure location helps decide whether the next test should investigate surface condition, adhesive-layer formation, the substrate itself or specimen preparation and gripping. Failure patterns have established classification methods; use the terminology of the specification selected for the project in formal records. [3]
Substrate tearing does not automatically mean that the project has passed. Nor can an interface separation in one photograph establish a root cause. Mixed failure may occur along one peel path. Record its location and extent, and interpret it with the original curves and repeat tests.
Use one record format to plan the next test
Use separate specimens for each time point and select the replicate count according to the chosen method. Peel testing damages the specimen; repeatedly testing the same strip does not create a valid time series. Keep materials, specimen preparation and methods as consistent as possible when comparing conditioning times. Leave unknown fields blank and mark them “not recorded” rather than filling them with plausible-looking values.
| Record group | Information to retain |
|---|---|
| Products and materials | Base adhesive and hardener, batches and TDS/SDS revisions; grades, layer stack and pretreatment of both materials |
| Mixing and specimen preparation | Actual mixing basis, adhesive timing reference, coat weight or adhesive-layer record, drying/activation, adhesive-layer temperature and pressing conditions |
| Early time points | Timing reference; holding, springback and edge observations; quantitative test time and method |
| Conditioning and environmental exposure | Actual time, temperature, humidity, exposure and recovery history; when and in what environment each measurement was taken |
| Methods and results | Width, angle, speed, averaging interval, replicate count, individual results, original curves and failure photographs |
| Project assessment | Source and revision of customer methods and limits, deviations, and variables to adjust or retest next |
If early holding is inadequate, first review the materials and surface condition, drying or activation, pressing and the actual adhesive layer. Do not explain or address the issue solely by adding more hardener. If the part holds its shape early but results after conditioning or environmental exposure are inadequate, analyze the conditioning history, interface and material durability separately. The next test may need different variables in the two cases.
Once flat specimens produce results that can be reviewed and checked, proceed to component validation. Recesses, corners, stretched areas and wrapped edges change loading and contact. Production-line coating, drying, temperatures and cycle times may also differ from the laboratory. Validate headliners, door panels and instrument panels against their actual component conditions and customer requirements; do not transfer one component's result directly to another.
Frequently asked questions
Do all water-based PU adhesives need the same hardener?
No. Whether a matched component is needed, which one to use and its addition level depend on the specific product and agreed plan. Information for R-5670 and R-60C is not a universal formulation for other PU adhesives or other R-60-series components.
Can high initial strength replace testing after conditioning?
No. An initial time point describes performance for the materials and process at that time. Tests after conditioning and environmental exposure address later performance and must be scheduled separately according to the project requirements.
Can products be substituted when their peel values are similar?
First check whether substrates, specimen preparation, conditioning, methods, units and failure locations are consistent. Even under the same conditions, review the actual component and project requirements. A similar number alone is not sufficient for a substitution decision.
Is a 7-day result the final strength?
Seven days is a defined test time point. Calling it final strength requires support from the relevant product documents and project method. It is not a universal endpoint for every water-based adhesive.
What should I provide when requesting an R-5670 sample?
Provide the component, both materials and pretreatments, existing coating, drying/activation and pressing conditions, and the source of the test methods and limits. Include any TDS/SDS revisions already held and failure photographs to help define the sample and next round of tests.
Sources and further reading
[1] ASTM D903-98(2025) public abstract
Supports defining specimens, pretreatment, temperature and test speed when comparing peel results. This article does not replace the complete standard.
[2] Public guide to peel testing
General background on peel geometry, result reporting and environmental conditions; not a RELANET product test report.
[3] ISO 10365:2022 public abstract
Background on classifying the main failure patterns of bonded assemblies. The concept diagrams in this article were drawn independently.
[4] RELANET R-5670 and R-60C strength and durability information
Source of the typical peel results, substrate combination and published test conditions discussed here. The stated limits on interpreting those results also apply.
RELANET water-based PU and PUD product information
Product identity and selection scope. Confirm actual application against current product documents and testing.
Further reading and sample evaluation
Download the blank specimen-evaluation record
- Water-Based Polyurethane Adhesive Systems for Automotive Manufacturing
- 2K Water-Based Polyurethane Adhesive | R-5670
- Peel strength vs shear strength: which test suits an automotive interior bond?
- Water-based adhesive peel strength: initial and final bond results
- Automotive trim adhesives for interior manufacturing